Installing MPICH2
- Download 32-bit or 64-bit MPICH installer (if you have Visual Studio 32-bit, you MUST use the 32-bit MPICH) from http://www.mcs.anl.gov/research/projects/mpich2/downloads/index.php?s=downloads
- Open the start menu
- Type "cmd"; this will bring up cmd.exe in the search results
- Right-click on the cmd.exe icon and click "Run as admistrator"
- Change directories to the location of the .msi file you just downloaded
- Execute the .msi file by entering it's name on the command prompt.
- You may be prompted with a security messgae from windows, continue
- Make sure to remember the "authentication passphrase for smpd". You must have this to run a program with mpich.
NOTE: If you have problems with installing MPICH2 or running it, you may need to lower the "User Account Control" settings on Windows 7. You can do so by doing the following:
- Open the Start Menu
- Type "User Account Control"
- Choose "Change User Account Control Settings" from the search results.
- You can lower the slider to the bottom to reduce the security level of Windows 7.
- Install MPICH
- Reset the security level back to what it was before.
Setting up Execution Service
After installing MPICH, check that the smpd.exe service is installed properly (this DOES NOT happen by default): check to see if there is a windows service called "MPICH2 Process Manager, Argonne National Lab". If it is not, do the following to install it (assumes 32-bit, remove (x86) for 64-bit):
- Open a command prompt
- Change directories to C:\Program Files (x86)\MPICH2\bin
- run "smpd -install"; the output will be: "MPICH2 Process Manager, Argonne National Lab installed."
Setting up Visual Studio
First, make sure that your Visual Studio version and MPICH version are using the same architecture. That is, if you have VS 2010 32-bit (the default student edition), you MUST have the 32-bit MPICH installed. You can check this by the MPICH installation directory. If MPICH is installed in C:\Program Files (x86), then you're using the 32-bit version; whereas, if it's installed in C:\Program Files, you're using the 64-bit version.
Once you're ready to code, setup the Visual Studio Project to use MPICH:
- Right click on the solution in the "Solution Explorer" window; choose properties (figure 1).
- Under "Configuration Properties", choose "VC++ Directories".
- Highlight the "Include Directories" row at the right.
- Click the down arrow at the far right of the highlighted row.
- Click "Edit<...>"
- Click the "New Line" icon (a folder with a start on it) at the top of the "Include Directories" dialog box.
- Click the "..." button.
- Add the MPICH include file location; for a 32-bit build, this is C:\Program Files (x86)\MPICH2\include, for a 64-bit build, this is C:\Program Files\MPICH2\include
- Click "Select Folder". Click "OK".
- Highlight the "Library Directories" row.
- Repeat steps 4 through 9 for the library directory of MPICH: C:\Program Files (x86)\MPICH2\lib or C:\Program Files\MPICH2\lib
- Under "C/C++", choose "General".
- Highlight "Additional Include Directories".
- Repeat steps 4 through 9 for the include directory of MPICH: C:\Program Files (x86)\MPICH2\include or C:\Program Files\MPICH2\include
- Under "Linker", choose "General".
- Highlight "Additional Library Directories".
- Repeat steps 4 through 9 for the libary directory of MPICH.
- Under "Input", choose "Input".
- Highlight "Additional Dependencies".
- Click the down arrow at the far right of the highlighted row.
- Click "Edit<...>"
- Add "cxx.lib" and "mpi.lib" (don't include the quotes).
- Click "OK".
- Click "OK" in the " Property Pages" window.

Figure 1: The Project Properties
Setting up the MPICH execution Environment
- Open a command prompt
- Execute "mpiexec -register" (enter your windows password for the password)
- Validate the user by running "mpiexec -validate -user <username>"
Running an MPI program with MPICH
- Add the MPICH bin directory, C:\Program Files (x86)\MPICH2\bin, to your path
- Find the .exe file created by VS 2010. I had to manually set the location of the .exe file in the "Output" section's "General" tab in the properties of the solution.
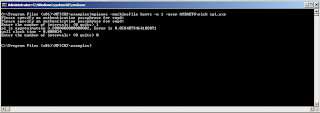
- If you have trouble, use the cpi.exe example (this is the first code example in the Using MPI book):
NOTE: I was unable to get more than 1 process running. I've emailed the MPICH discussion list to see if anybody knows what's wrong.


