Saturday, March 10, 2012

Using MPICH on the Janus Cluster

Overview
  • Each node has 12 cores (2 cpus) (intel eon 2.8 Ghz)
  • 2 GB of RAM per core, 24 GB of RAM per node
  • QDR infiniband interconnect
 File System

/home/<username> (2 GB quota)
/projects/<username> (256 GB quota, not for job output)
/scratch/stmp00/<username> (not backed up, intended for job I/O)

Steps to run an MPI Program
1) Load Dotkit for MPI
use .openmpi-1.4.3_ib

2) compile
mpicc -std=c99 -o <outfile> <inputfile>

The -sdd=c99 is needed if you want to use C99 (you probably do).  With c99, you can do a loop like:
for(int i = 0; i <n; i++) {...}
Without c99, you have to write this loop as:
int i;
for(i = 0; i < n; i++) {...}

3a) Submit
use Torque
use Moab

3b) write a batch script to run the mpi program (must be in PBS standard) parallel batch scheduler?

3c) submit:
qsub -q janus-debug run.sh

-q = run queue
rc.colorado.edu/crcdocs/queues

4) track status
qstat -f -u $USER
showq -u $USER


5) Kill job
qdel [jobid]
mjobctl -c [jobid]


Sunday, February 26, 2012

Using MPICH on Windows 7 with MS Visual Studio 2010

Installing MPICH2
  • Download 32-bit or 64-bit MPICH installer (if you have Visual Studio 32-bit, you MUST use the 32-bit MPICH) from http://www.mcs.anl.gov/research/projects/mpich2/downloads/index.php?s=downloads
  • Open the start menu
  • Type "cmd"; this will bring up cmd.exe in the search results
  • Right-click on the cmd.exe icon and click "Run as admistrator"
  • Change directories to the location of the .msi file you just downloaded
  • Execute the .msi file by entering it's name on the command prompt.
  • You may be prompted with a security messgae from windows, continue
  • Make sure to remember the "authentication passphrase for smpd".  You must have this to run a program with mpich.

NOTE: If you have problems with installing MPICH2 or running it, you may need to lower the "User Account Control" settings on Windows 7.  You can do so by doing the following:
  1.  Open the Start Menu
  2. Type "User Account Control"
  3. Choose "Change User Account Control Settings" from the search results.
  4. You can lower the slider to the bottom to reduce the security level of Windows 7.
  5. Install MPICH
  6. Reset the security level back to what it was before.

Setting up Execution Service
After installing MPICH, check that the smpd.exe service is installed properly (this DOES NOT happen by default): check to see if there is a windows service called "MPICH2 Process Manager, Argonne National Lab".  If it is not, do the following to install it (assumes 32-bit, remove (x86) for 64-bit):
  • Open a command prompt
  • Change directories to C:\Program Files (x86)\MPICH2\bin
  • run "smpd -install"; the output will be: "MPICH2 Process Manager, Argonne National Lab installed."

Setting up Visual Studio
First, make sure that your Visual Studio version and MPICH version are using the same architecture.  That is, if you have VS 2010 32-bit (the default student edition), you MUST have the 32-bit MPICH installed.  You can check this by the MPICH installation directory.  If MPICH is installed in C:\Program Files (x86), then you're using the 32-bit version; whereas, if it's installed in C:\Program Files, you're using the 64-bit version.

Once you're ready to code, setup the Visual Studio Project to use MPICH:
  1. Right click on the solution in the "Solution Explorer" window; choose properties (figure 1).
  2. Under "Configuration Properties", choose "VC++ Directories".
  3. Highlight the "Include Directories" row at the right.
  4. Click the down arrow at the far right of the highlighted row.
  5. Click "Edit<...>"
  6. Click the "New Line" icon (a folder with a start on it) at the top of the "Include Directories" dialog box.
  7. Click the "..." button.
  8. Add the MPICH include file location; for a 32-bit build, this is C:\Program Files (x86)\MPICH2\include, for a 64-bit build, this is C:\Program Files\MPICH2\include
  9. Click "Select Folder".  Click "OK".
  10. Highlight the "Library Directories" row.
  11. Repeat steps 4 through 9 for the library directory of MPICH: C:\Program Files (x86)\MPICH2\lib or C:\Program Files\MPICH2\lib
  12. Under "C/C++", choose "General".
  13. Highlight "Additional Include Directories".
  14. Repeat steps 4 through 9 for the include directory of MPICH: C:\Program Files (x86)\MPICH2\include or C:\Program Files\MPICH2\include
  15. Under "Linker", choose "General".
  16. Highlight "Additional Library Directories".
  17. Repeat steps 4 through 9 for the libary directory of MPICH.
  18. Under "Input", choose "Input".
  19. Highlight "Additional Dependencies".
  20. Click the down arrow at the far right of the highlighted row.
  21. Click "Edit<...>"
  22. Add "cxx.lib" and "mpi.lib" (don't include the quotes).
  23. Click "OK".
  24. Click "OK" in the " Property Pages" window.

Figure 1: The Project Properties

Setting up the MPICH execution Environment
  1. Open a command prompt
  2. Execute "mpiexec -register" (enter your windows password for the password)
  3. Validate the user by running "mpiexec -validate -user <username>"

Running an MPI program with MPICH
  • Add the MPICH bin directory, C:\Program Files (x86)\MPICH2\bin, to your path
  • Find the .exe file created by VS 2010.  I had to manually set the location of the .exe file in the "Output" section's "General" tab in the properties of the solution.
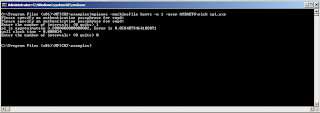
  • If you have trouble, use the cpi.exe example (this is the first code example in the Using MPI book):


NOTE: I was unable to get more than 1 process running.  I've emailed the MPICH discussion list to see if anybody knows what's wrong.

Monday, November 28, 2011

Comparing Date Formatting Options

Since Java's SimpleDateFormat object isn't thread-safe and synchronizing it in a production application is a bad idea, I've looked into a few alternatives:
1) Create a new SimpleDateFormat object each time we wish to parse a string into a date
2) Create a single SimpleDateFormat object per thread
3) Use the Joda Time library do format dates

I've run two tests on six methods of parsing text:
1) One instance of SimpleDateFormat called many times
2) One static instance of SimpleDateFormat called many times
3) Many instances of SimpleDateFormat called once each
4) One instance of DateTimeFormatter (JodaTime) called many times
5) One static instance of DateTimeFormatter (Joda Time) called many times
6) Many instances of DateTimeFormatter (Joda Time) called once each

The two tests are:
a) 1 formatter x 10,000 parses
b) 10,000 formatters x 2 parses

Test a:
1a) 23 ms.
2a) 28 ms.
3a) 198 ms.
4a) 9 ms.
5a) 10 ms.
6a) 11 ms.

Test b:
1b) 24 ms.
2b) 24 ms.
3b) 304 ms.
4b) 54 ms.
5b) 12 ms.
6b) 9 ms.

Option 1 is the control group because it represents the status-quo (and it's not usable since it doesn't work properly in a multi-threaded environment).  Option 3 is clearly out since it has the worst performance on both metrics.  Options 5 and 6 are both appealing since they both perform well on the tests.


I've chosen to go with option 6 because it removes any concerns abouth multi-threading (though Joda Time doesn't have many).

Saturday, October 1, 2011

Building Numerical Approximations In Erlang

This post is partially complete (I don't have a lot of time to work on it)...

I'm writing this post for a few reasons:
1) I keep telling people that I'm actually going to redo projects or homework that I've done for class, but in Erlang (because Erlang is cool)
2) I might have volunteered to give a short talk on Erlang, so I need to have something prepared in just in case


Erlang documentation is limited due to its low number of users.  There are two excellent books and a great language walk-through at http://learnyousomeerlang.com/contents.


Root finding (a.k.a., where does a function cross zero) is common in scientific computing: it is concernted with finding a number r such that f(r) = 0.  There are several common root finding algorithms: Newton's Method, the Finite-Distance Newton's Method, the Secant Method, and the Bisection Method.  Let's start by considering Newton's Method; it is defined by the sequence xn+1 = xn - f(xn)/f'(xn).  When, you might ask, should we stop getting new xn+1's?  When we are "close" to zero (the root of the equation); "close" is not really codable though.  Or is it?  On a floating-point system (i.e., any computer ever built), there are numbers so small (i.e., close to 0) that, when added to another number, the equal that other number.  By convention, we say that a number n is less than the machine epsilon when (1 + n) = 1.  The machine epsilon is the smallest number emsuch that (1 + em) != 1.

Ok, let's code finding the machine epsilon and determining if a number is smaller than it.

Erlang is simple and elegant.  Let's walk through the lines of code to see what they do.

Line 1: Declare this file as a module (so that we can reuse it later)

Lines 3 & 4: Export three functions with 0, 1, and 1 argument each, respectively

Line 7: If no argument is passed to calculate_machine_epsilon, pass 2 in (base 2 is a simple algorithm)

Line 8 & 9: Make an initial guess about the machine epsilon; we use 1 because base^0 = 1 for any base.  The no indicates to our later code that we are not done guessing machine epsilons.  The no is called an atom in the Erlang language.  Any word starting with with a lower-case letter is an atom.  Note that function names are atoms; this is on purpose.


Lines 11 & 12: An Erlang function doesn't take in variables in the way you'd see in most languages.  Instead, functions are pattern matchers.  At runtime, when an Erlang function is called, the virtual machine looks for any matching functions, if none are found, it throws a bad_match error.  So when you we see

we can guess that the developer indended this function to only have two valid values for the final argument of this function: yes and no (this is a good bet since I wrote the code).  Thus, if you called calculate_machine_epsilon(_Base, LastGuess, 100.5) your code would crash.  In practice, this is helpful because you code for specific patterns and testing will indicate bugs pretty quickly.  You'll note that the first definition of this function  has a _Base argument for the first variable; whereas, the second has Base.  Erlang's compiler warns if you do not use every variable that you've set; the _ prefix to a variable name tells the compiler that you don't intend to use the variable (so it doesn't warn).  Keeping the name the same (except for the _) is useful when somebody tries to figure out what code does months later.   Note that, in this case, the function has the same number of arguments and they appear to be (from the definition) the same "type."  Functions do not need to have the same number of arguments, and the types of each function with the same number of arguments don't need to be the same (think patterns instead of traditional c-style functions).

Line 11 (specific): The second variable is the last guess; the third variable should be yes if the last guess is less than the machine epsilon.  Thus, if it is yes, we're done, so return the last guess.

Line 12 (specific):  The last guess of machine epsilon isn't small enough, so do more.  Note that line 9 passed no to this function with the initial guess of 1.

Line 13: The next guess of the machine epsilon is the current guess divided by the number base.

Line 14: Call this same function again, passing in the guess we just calculated and the value of is_less_than_machine_epsilon.

Lines 16 - 19: A number n is less than the machine epsilon if 1 + n = 1.  These three lines of code show Erlang's pattern matching at its strongest.  I call machine_epsilon_test(number + 1) and pattern match it against machine_epsilon_test(1.0) and machine_epsilon_test(_Other).  In another language, this would be done with an if statement.  Erlang, however, allows you to do it via pattern matching.  This is both elegant and reusable.


You may have noticed that the algorithm is correct for base 2 but not for any other meaningful base.  It doesn't find the true machine epsilon.  Let's update the algorithm to do so:


Now that we have a mechanism for determining if a number is "close" to zero (it is less than the machine epsilon), let's build Newton's Method:


Now, an Emakefile:


And an ant build file (because Ant is great):


It's time for me to run some errands with my wife and daughter, so I'm going to finish the commentary later.
calculate_machine_epsilon(_Base, LastGuess, yes) -> ...
calculate_machine_epsilon(Base, LastGuess, no) -> ...
calculate_machine_epsilon(_Base, LastGuess, yes) ->...
calculate_machine_epsilon(Base, LastGuess, no) -> ...

Monday, September 12, 2011

Using Lucene

Basic Resources
Java Docs: http://lucene.apache.org/java/3_3_0/api/core/index.html
Wiki: http://wiki.apache.org/lucene-java/FrontPage?action=show&redirect=FrontPageEN
Lucene in Action, Chapter 1 (provided by publisher for free): http://www.manning.com/hatcher3/Sample-1.pdf*

* The examples in the book are deprecated, so I suggest downloading the source jar file and looking at the demo classes.


Lucene Query Syntax: http://lucene.apache.org/java/3_3_0/queryparsersyntax.html

Useful Function Calculator

The function calculator at http://wims.unice.fr/wims/en_tool~analysis~function.en.html is useful when approximating functions because it can give you up to 5 derivatives and graph ranges.

Friday, September 9, 2011

Using the Erlang re module (Regular Expressions)

1> re:replace("/var/lib/test/nick", "^.*\/", "hi ",[{return,list}]).
"hi nick"

If  you don't specify the [{return,list}], you get something generally useless:
2>re:replace("/var/lib/test/nick", "^.*\/", "hi ").               
[<<"hi ">>|<<"nick">>]


References:
[1] http://www.erlang.org/doc/man/re.html